Friday, January 11, 2013

civil war quilt


I made this quilt for my sister & brother-in-law for Christmas & for my sister's birthday, which is 2 weeks after Christmas.  We don't exchange gifts for Christmas or birthdays, so I really made it just because I love them.  (Don't worry Mom & Dad, you are getting quilts someday.)


I didn't take any pictures of the "process" of making this quilt because there wasn't much to show.  I made this quilt top in about 2 hours!  The center fabric is a "cheater" fabric - also known as wholecloth fabric.  I did piece the cheater fabric just a bit in order to make it wider than 44".  Then, all I had to do was cut & join my border fabrics & add them to the sides.


I quilted this on the long arm at my LQS.  I used a simple crosshatch in every other square for the center fabric.  The inner border was quilted with a simple wavy pattern.  For the outer border, I did meander quilting.  It is really fun to do meander quilting on a long arm!

Someday I would like to make my sister & brother-in-law this Civil War tumbler quilt.  The kit is for sale at my LQS.  (I don't know if I should even tell you that - I don't want them to sell out before I purchase mine!)  It is a really beautiful quilt. I just didn't have time to piece it before Christmas, plus I already had the cheater fabric, so I thought I should use it.  I do like the quilt I made, just not quite as well as the tumbler quilt.  ;)


For the backing I used a green Civil War wide back, also from my LQS.  I used the leftover backing for the binding. 

Quilt Stats:
 Fabric:  Marcus Fabrics Civil War wholecloth fabric (I forgot to get the exact name)
                Batting - Warm & Natural
                Backing & Binding - green Civil War wide back
Pattern: pieced the wholecloth fabric to make it a bit wider, then added borders
Dimensions: 64" x 70"
Started quilt top: December 17th, 2012
Finished quilt top: December 17th, 2012
Quilted: on long arm at Quilt-N-Kaboodle by me
Made for: my sister & brother-in-law for Christmas & my sister's birthday

-V

Linking up to Finish It Up Friday hosted by Amanda Jean @ Crazy Mom Quilts.
Linking up to Confessions Of A Fabric Addict.
Linking up to Richard & Tanya Quilts.
Linking up to Thank Goodness It's Finished Friday hosted by From Blank Pages.
Linking up to The Free Motion Quilting Project.

Saturday, January 5, 2013

{ 2012 year in review } & 2013 "goals"

{I am late getting this posted because I worked at my LQS on New Year's Day, helping with inventory.  The next day, my daughter got sick and we just found out yesterday that it is strep throat, so now that she has antibiotics in her system, she is doing much better and I am able to get a bit typed up....}

Well, 2012 was a decent year.....


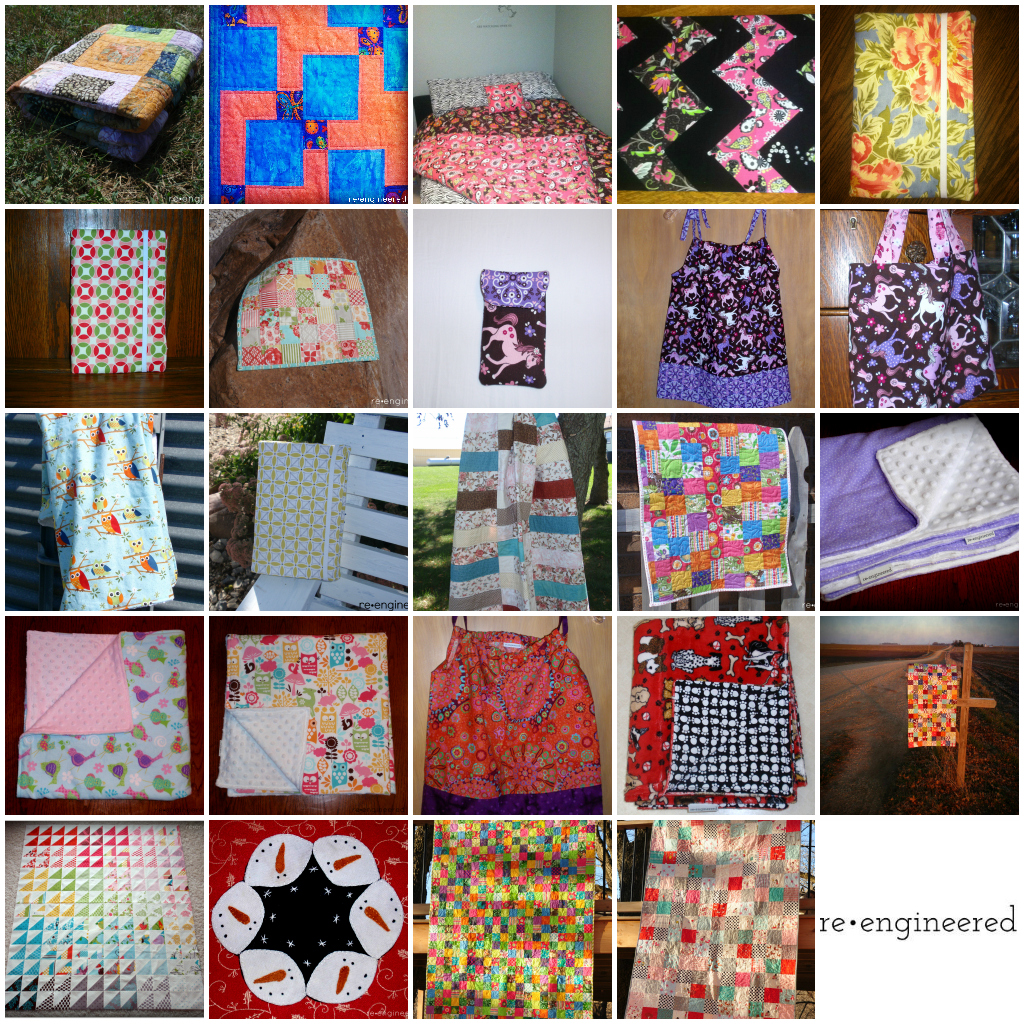
In case you want to check out the blog post for any of these projects, here are the links:

1. Beginner's quilt   2. Quilts for Kids quilt   3. Duvet cover & matching pillows   4. Fabric covered cork board   5. Kindle cover   6. Kindle cover   7. Doll quilt   8. iPod pouch   9. Pillowcase dress   10. Tote bag   11. Baby blanket   12. Kindle cover   13. Emma Grace quilt   14. Doll quilt   15 - 17. Baby blankets   18. Pillowcase dress  19. Baby blanket  20. Table runner (still need to blog about finishing this one!)   21. It's a Hoot HST quilt top (technically not completely finished as it still needs to be quilted)   22. Snowman mat   23. Ava's 2012 Christmas quilt   24. Ella's 2012 Christmas quilt

I only have one UFO (unfinished object) from 2012, and that is the It's a Hoot HST quilt top.  I can not decide what to do for a backing.  I am going back and forth between ordering yardage of one of the prints from the fabric line (or ordering yardage of a few of the prints from the line for a pieced backing), or using the "background" fabric, which was a cream fabric with green polka dots.  I just can't decide.....

I also just finished binding 2 quilts, so those will be my first 2 finishes of 2013!  In addition, I am working on a quilt top and I will *hopefully* show you all of those very soon!

I don't really believe in New Year's Resolutions.  I think that if something is important enough to you, you don't wait for the New Year to make it happen; you just start doing it!  With that being said, my "New Year's Resolutions" are really just goals that I started awhile back & hope to continue to follow through on....

The first is to use my fabric stash.  I decided at some point that I am really not the type of person to have a huge fabric stash.  It bothers me.  I don't like clutter and I don't have a lot of room in my house.  When I start new projects, I want to be able to go out and buy new fabric!  Plus, my LQS is awesome, so technically I have an entire shop's worth of "stash" very nearby!

The second is to have ZERO unfinished projects at any given time.  I am not the type of person who can have multiple projects going on at one time.  I prefer to start something and finish it without getting side tracked.  I find it very distracting and somewhat "stressful" to have just that one UFO sitting in my closet!

My third goal is to make more of what I want rather than taking custom orders or making things for a craft show.  Of course, there will be exceptions, but I hope to focus more on quilting for myself & my loved ones and less on making things "mass production" style.

My last (and perhaps most important) goal is to make at least one quilt for Quilts for Kids.  Of course, I would love to make more than one, but I will start with just one for my goal, as I think that is achievable.

Well, that is all for now.  I hope to be back here soon with pictures of my first 2 finishes of 2013!

~V

Tuesday, January 1, 2013

ella's christmas quilt : finished

As promised, here are some pictures & details about Ella's quilt, which I finished just before Christmas & am just now getting around to blogging about....  (Pictures taken by my Uncle John!  Thank you John ~ I owe you!)


I quilted this on the long arm at my LQS with a pantogram pattern.  (They have a computerized long arm so don't think I did this free hand!)  Since I used charm packs for this quilt, I didn't have anything left over to use on the back, so the back is just a solid purple / lavender that matches the purple dresses on the little girls in the Children at Play fabric.  (You can read more about the making of this quilt top here and here.)  Purple is Ella's favorite color, which was the main reason I went with purple.


A few close up pictures.... I love those little girls!  


I went with a black & white striped binding.  I've followed Rita's blog for quite awhile now and I love her striped bindings.  So I shamelessly copied her.  


And one last picture (that I took myself - can't you tell?)....  I initially forgot to sew my label into the binding, so I had to go back and rip the binding stitches out and add the label.  


I loved making this quilt & I hope Ella loves it too.  She wouldn't let me take any pictures of her holding it ~ maybe someday. ;)

Quilt Stats:
 Fabric: Aneela Hoey's "A Walk in the Woods", "Little Apples", & "Sherbet Pips" : one charm pack of each line
             "Pinwheels", "Summer Gardens", and "Dolls" from Sarah Jane's "Children at Play" line
              Michael Miller Ta-Dot (black polka dot on white background)
              Backing - purple Moda solid (forgot to document the name)
              Batting - Warm & Natural
              Binding - Kensington for Quilting Treasures
Pattern: simple patchwork using 5" charm squares (4.5" finished)
Dimensions: 50" x 72"
Started piecing on: August 24th, 2012
Finished piecing on: September 1st, 2012
Quilted: on long arm at Quilt-N-Kaboodle by me using computerized pantogram
Made for: my niece Ella for Christmas 2012

Linking up to Lily's Quilts Small Blog Meet:
Lily's Quilts
And linking up to Finish It Up Friday hosted by Amanda Jean @ Crazy Mom Quilts.

-V

Friday, December 28, 2012

ava's christmas quilt : finished

 
I finished Ava & Ella's Christmas quilts just before Christmas.  I quilted them both on the long arm at my LQS!  I used pantograms for both quilts as they are simple patchwork quilts and I didn't need anything "fancy".  Although I do think they are very nice and fairly detailed pantograms.  (More on Ella's quilt in a future post.)

My Uncle John took pictures of the quilts (on his awesome deck!).  Thank you, John!  I owe you big time!  Now here comes a barrage of pictures:


I had a few blocks left over after I finished piecing the top, so I put those on the back of the quilt.


I decided to bind Ava's quilt with the green chevron fabric from V & Co's line Simply Color.  I love the look of it.  I didn't quite cut the fabric correctly, but now I know in the future to cut my binding strips based on the fabric.  I think I will stock up on these chevrons for future bindings!  (The pictures that follow were taken by me - as you can probably tell!  I forgot to ask John to get some pictures of the binding.)


A little close-up detail of the quilting on the back.....


One more picture I took myself while perching on the edge of the my deck railing, trying not to fall into the bushes.... (much better & safer to have John take pictures).


And here is Ava holding up her quilt on Christmas Eve....


I think she liked it :-D


Quilt Stats:
 Fabric:  Miscellaneous fabrics from Hobby Lobby
                Michael Miller Ta-Dot in pink, raspberry, aqua, & grape
                Backing – green Stonehenge fabric (forgot to document the details)
                Batting – Warm & Natural
                Binding – white & lime green dotted zig zag from the Simply Color fabric line by V & Co for Moda
Pattern: simple patchwork, strip pieced using 3” strips (finished at 2.5” squares)
Dimensions: 50" x 70"
Started quilt top: May 2012
Finished quilt top: August 3rd, 2012
Quilted: on long arm at Quilt-N-Kaboodle by me using computerized pantogram
Made for: my niece Ava for Christmas 2012

Linking up to Finish It Up Friday hosted by Amanda Jean @ Crazy Mom Quilts.

-V

the one & only penny mat


You may remember this penny mat that I started working on 3 months ago....  I finally finished it about a week before Christmas.  I gave it to my sister as her "Christmas gift" since we don't exchange gifts.  It wasn't that difficult of a project, just time consuming.  In the time that it took me to make it, I could have pieced a quilt top.  I'd rather have the quilt top, but my sister likes the penny mat, so that is all that matters.  The only other thing I have to say about this project is that I am glad it is done. ;)

-V

Friday, December 21, 2012

baby blanket : custom order


I made this baby blanket for my aunt to give as a Christmas gift.  She came into the quilt shop when I was working and I helped her pick out the fabrics. The red fabric is minky, which is a soft, plush fabric that is actually polyester, but feels amazing.  The black & white fabric is 100% cotton and has small paw prints on it.  She purchased a yard of each, so this blanket measures approximately 34" x 40". 


 I always pre-wash my cotton fabrics when making baby blankets.  I wash & dry, then repeat.  The first time I made a blanket, I did not do this and the cotton shrank and distorted the shape of the blanket.  The minky does not shrink (since it is polyester), so I do not pre-wash it.  Also, the minky would "shed" everywhere if it was washed with raw edges. 

After the cotton has been pre-washed, I square up the edges.  I then lay the cotton fabric on top of the minky fabric ("right" sides together) and cut around both fabrics.  From there, I sew the sides together with a 1/2" seam allowance, leaving a 6 inch gap to turn the fabric out.  Before I turn the fabric out, I clip the corners to remove the bulk.  Then I turn the fabric out, push the corners out, and pin the opening shut.  Then I top stitch around the blanket 1/4" from the edge, making sure to catch the opening.  It's just that simple.  The only other thing I do is I set my stitch length quite short when I am sewing the fabrics together on the "inside".  When I am top stitching, I set my stitch length a bit longer - I just think it looks nicer to have a longer top stitch.  These really are the easiest blankets to make and anyone can make one!  I hope you'll try!

-V

Wednesday, December 19, 2012

rainbow hexagon quilt top : pieced


I finished piecing the hexagon quilt top almost 2 weeks ago.  (I think anyway.  I know it has been long enough ago that I have already lost track of the time.)  It went really smoothly since all I had to do was sew the half hexagons into long (vertical) rows and then join the rows.

I pressed my seams to the side throughout.  That worked pretty good to get the hexagons to "nest" nicely, and my points line up amazingly well on the hexagons.  I also pressed the long seams of the rows just to one side because it was easier and faster.  I definitely prefer the look and "feel" of seams pressed open, however.  This quilt top did not lay as flat as my others that had the seams pressed open.  Hopefully once this quilt is finished, the difference will not be as noticeable.


I pieced the back out of 5 fabrics from the "Cuzco" line by Kate Spain for Moda.  I love this fabric line!  It is full of vibrant colors & very interesting designs.  I am so fortunate that my LQS carries such great fabrics!

The quilt back has been pieced and everything has been dropped off at my LQS (Quilt-N-Kaboodle) for long-arm quilting.  This quilt is going to be on display at the quilt shop!  I think I might pee my pants a little when I see it hanging up there!  More pictures to come when the quilt is fully finished & ready for display.

-V