Friday, December 28, 2012

the one & only penny mat


You may remember this penny mat that I started working on 3 months ago....  I finally finished it about a week before Christmas.  I gave it to my sister as her "Christmas gift" since we don't exchange gifts.  It wasn't that difficult of a project, just time consuming.  In the time that it took me to make it, I could have pieced a quilt top.  I'd rather have the quilt top, but my sister likes the penny mat, so that is all that matters.  The only other thing I have to say about this project is that I am glad it is done. ;)

-V

Friday, December 21, 2012

baby blanket : custom order


I made this baby blanket for my aunt to give as a Christmas gift.  She came into the quilt shop when I was working and I helped her pick out the fabrics. The red fabric is minky, which is a soft, plush fabric that is actually polyester, but feels amazing.  The black & white fabric is 100% cotton and has small paw prints on it.  She purchased a yard of each, so this blanket measures approximately 34" x 40". 


 I always pre-wash my cotton fabrics when making baby blankets.  I wash & dry, then repeat.  The first time I made a blanket, I did not do this and the cotton shrank and distorted the shape of the blanket.  The minky does not shrink (since it is polyester), so I do not pre-wash it.  Also, the minky would "shed" everywhere if it was washed with raw edges. 

After the cotton has been pre-washed, I square up the edges.  I then lay the cotton fabric on top of the minky fabric ("right" sides together) and cut around both fabrics.  From there, I sew the sides together with a 1/2" seam allowance, leaving a 6 inch gap to turn the fabric out.  Before I turn the fabric out, I clip the corners to remove the bulk.  Then I turn the fabric out, push the corners out, and pin the opening shut.  Then I top stitch around the blanket 1/4" from the edge, making sure to catch the opening.  It's just that simple.  The only other thing I do is I set my stitch length quite short when I am sewing the fabrics together on the "inside".  When I am top stitching, I set my stitch length a bit longer - I just think it looks nicer to have a longer top stitch.  These really are the easiest blankets to make and anyone can make one!  I hope you'll try!

-V

Wednesday, December 19, 2012

rainbow hexagon quilt top : pieced


I finished piecing the hexagon quilt top almost 2 weeks ago.  (I think anyway.  I know it has been long enough ago that I have already lost track of the time.)  It went really smoothly since all I had to do was sew the half hexagons into long (vertical) rows and then join the rows.

I pressed my seams to the side throughout.  That worked pretty good to get the hexagons to "nest" nicely, and my points line up amazingly well on the hexagons.  I also pressed the long seams of the rows just to one side because it was easier and faster.  I definitely prefer the look and "feel" of seams pressed open, however.  This quilt top did not lay as flat as my others that had the seams pressed open.  Hopefully once this quilt is finished, the difference will not be as noticeable.


I pieced the back out of 5 fabrics from the "Cuzco" line by Kate Spain for Moda.  I love this fabric line!  It is full of vibrant colors & very interesting designs.  I am so fortunate that my LQS carries such great fabrics!

The quilt back has been pieced and everything has been dropped off at my LQS (Quilt-N-Kaboodle) for long-arm quilting.  This quilt is going to be on display at the quilt shop!  I think I might pee my pants a little when I see it hanging up there!  More pictures to come when the quilt is fully finished & ready for display.

-V

Sunday, November 25, 2012

i'm baaaack

I promise I have been working on quilts - I just haven't had time to blog lately!  After the craft show I took a day or two off and caught up around the house, which was much needed.


But then of course, I decided to start something new & these solids at my LQS caught my eye.  Also, they had a new notion, the Hex N More ruler, that I had read about on Julie's blog Jaybird Quilts.


I really like the ruler, it made cutting the half hexagons very quick work.  I had them all cut out in just over 2 hours.  I'm glad I had the foresight to realize that this layout was going to take me awhile, so I laid an old white sheet on my basement floor (don't you just love the orange shag carpet?) and have been rearranging the pattern for the past 2 weeks.  Just this afternoon I finally decided I've had enough & this is (hopefully) going to be the final layout.

I also spent the past 2 days using the long arm machine at Quilt-N-Kaboodle to finish quilting Ava & Ella's Christmas quilts.  More on that as soon as I get the bindings sewn on & pictures taken!

-V

Saturday, November 10, 2012

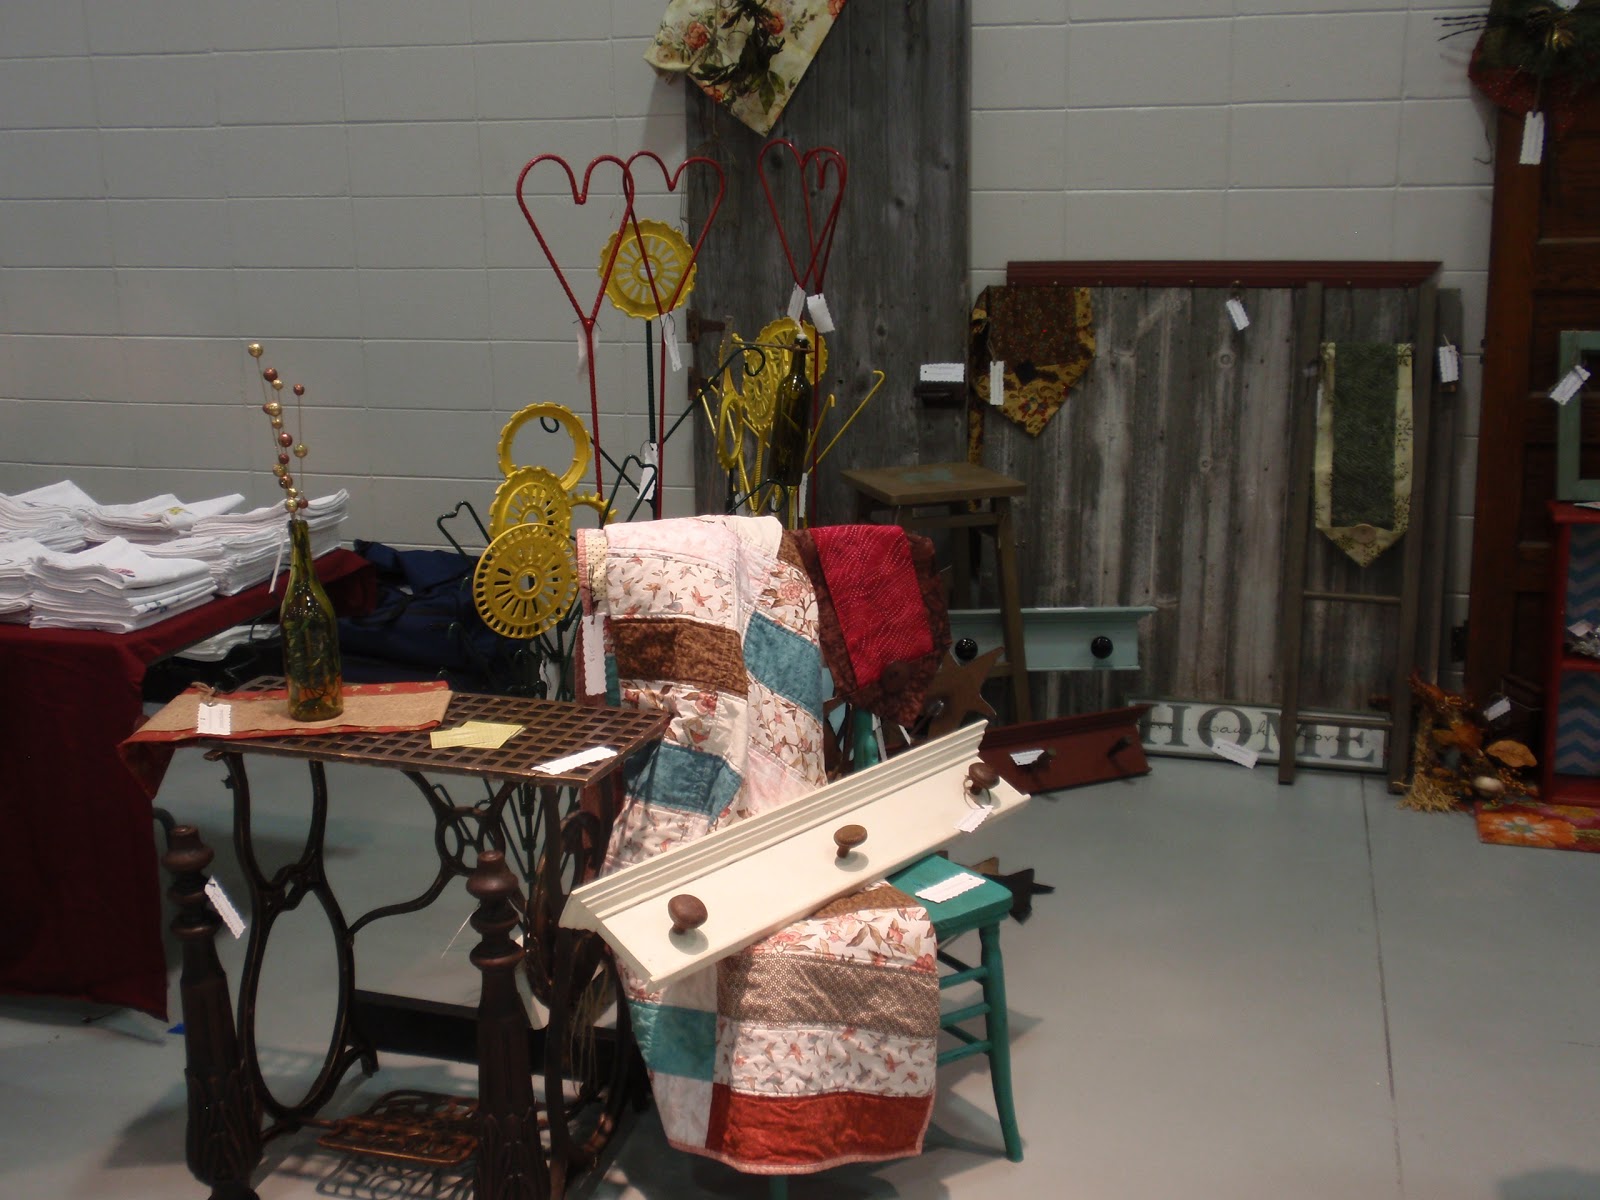
craft show booth pictures...

Our booth space - filled with "re•engineered" items!

Left side of booth.... including sewing machine table that I gilded with gold leaf. I didn't get a good close up picture of it, but it was awesome & sold, so this is the best you get. ;)
Center of booth... Instagram picture my cousin took

Right side of booth...

Far right side of booth... including chair I painted with Annie Sloan chalk paint & distressed, quilt I made, and sewing machine table.... these items didn't sell, so hopefully more detailed pictures coming soon...

End table I distressed, also did not sell, so better pictures coming soon... my sister's garden decorations in the background were a big hit!

Bookcase & hanging file drawer painted with chalkboard paint! I love them both! The bookcase sold, but the hanging file drawer did not... and lots of baby blankets & burp cloths that did not sell :(  They were displayed better to start with, but I needed a better system there...

Also, a link to our Facebook page, if you want to check that out:
https://www.facebook.com/reengineered.designs

And now, to catch up on some sleep & then get back to QUILTING!

-V

Thursday, November 8, 2012

simply color + parisville table runner

Someday I will get better at naming my projects.... maybe... or maybe not.

I finished piecing the top of this table runner late last night:


and finally had the chance to take some pictures late this afternoon:

Picture edited by my Uncle John ;)

I love the bright, somewhat jewel tone, colors (not to mention the designs... clam shells! chevrons! diamonds!):


I wish my points matched up better in some spots.  I need to get better at cutting accurately.  Now I am impatiently waiting for the yardage of Simply Color to land at my LQS so I can pick out the backing for this table runner & get it quilted!

This is what Tensley did while I took pictures:

piled rocks on her legs and pointed at all the farm machinery in the surrounding fields

And this is what the sun was doing:

5:00

Craft show in 2 days & I promise I have more pictures to share.... a little overwhelmed trying to get ready, but it will be over soon & I will be back to quilting more!

-V

Thursday, November 1, 2012

simply color table runner


I'm really looking forward to using these fabrics to make a bright, cheerful table runner.  The fabric on the top is Simply Color by V & Co for Moda.  The bottom fabric is Parisville by Tula Pink for Free Spirit Fabrics.  The colors match perfectly.  Simply Color yardage should be out in the next day or two, but my LQS had a charm pack on hand.  Parisville came out in 2010, but I managed to find some about a year ago and have been stashing hoarding it since then.  


Here they are cut into 2.5" squares....  Now I just need to find the time to get them sewn together!

-V